
This post originally appeared on the WITNESS blog.
As pro-democracy protests gain momentum in Hong Kong, authorities in Beijing have made it clear that they consider the protests illegal and hint at a brutal crackdown if they continue.
Armed with cameras (and umbrellas- thus the “Umbrella Revolution” as some call it), many protesters have taken to documenting the events as they unfold. To help ensure that activists are safely, ethically and effectively capturing footage, we’ve compiled some tips for documenting protests and police violence.
Scroll to the bottom for a complete list of free, downloadable resources.
Before Filming
- Assess the risks of filming and develop a security plan to protect your safety.
- Bring or memorize emergency contact information.
- Be prepared. Test your equipment and make sure you have extra batteries and memory cards.
- If you can’t run with it, don’t bring it.

During Filming
Film with intention: Hold shots for at least 10 seconds. Keep the camera steady and move it slowly when changing position.
Verification: Your video will be easier to authenticate if you include details such as the time, date and location. When possible, turn on the GPS feature and/or record intersections, street signs and landmarks. Make sure the automatic date and time are set correctly and speak your name into the camera to identify who is filming.
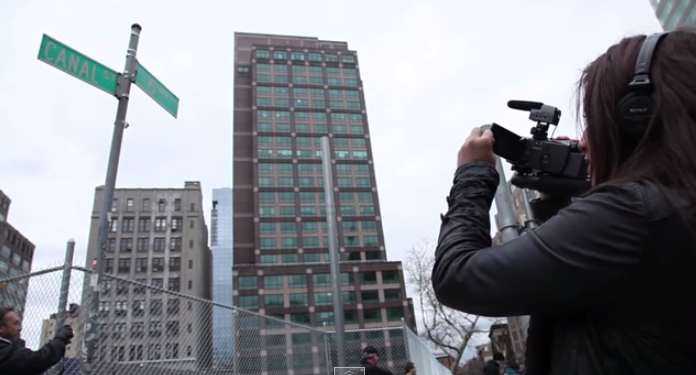
Film street signs or landmarks to make your video easier to verify.
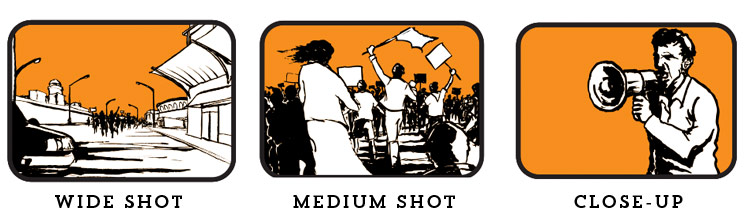
Variety of Shots: Capture wide shots to show the size of the crowd or position of the authorities, if possible, film from a balcony, rooftop or window to get an aerial perspective. Get medium shots to show activity in the crowd. When safe, record close-up shots to show details such as, injuries, police badges, the surrounding crowd, nearby vehicles.
Narration: Consider narrating while filming to add contextualizing details. Alternately, you can ask for details of the incident from consenting victims or witnesses.
Informed Consent: Clearly explain the purpose of the interview, how it will be used/shared, and the implications if the video is shared online. Confirm that the interviewee accepts the risks of being recorded and ask them to state their consent on-camera.
Concealing Identity: If your interviewee prefers to remain anonymous, you can obscure their image and voice using editing software. Below are some techniques for concealing their identity while filming:

Filming Injuries: Try to get close to the body to film injuries. Bring a ruler or common object to demonstrate the size of the injury. Consider taking photos as well as recording video. Include shots of the entire body and surrounding environment to show context (including bullet holes, bloodstains, etc.).
Filming in Teams: Filming with a partner or a team allows you to capture multiple angles and perspectives, leading to more compelling video and may provide better evidence in a court of law. Establish the roles of each team member before filming.
Suggested roles:
- Camera 1: Films details of the crowd and authorities, signs, badge numbers, license plates.
- Camera 2: Films within the crowd to get a sense of the action.
- Camera 3: Films establishing/wide shots to capture the full scope of the event.
- Camera 4: Films interviews to provide context and eyewitness testimony.
- Editor & Uploader: Receives and saves footage, organizes media files and uploads content.
After Filming
Sharing Media: If uploading your footage to an online platform, include the location and date in the video’s title. Include a brief description to provide context about the events. This will make it easier to verify your video and more likely to be used in the media or for evidence.
Graphic Footage: If you are uploading violent or disturbing footage, include “GRAPHIC” in the title of your video to warn viewers.
Archiving Videos: Preserving your videos properly can strengthen the chances of the footage being used for evidentiary purposes. Watch this video about the importance of archiving human rights footage and how to develop a plan to preserve your media, or read this blog post with basic steps for preserving your footage for justice and accountability.
Downloadable Tip Sheets & Resources
- Filming Protests & Police Brutality
- How to Film Protests
- Filming in Protests in Teams
- Filming with a Mobile Phone
- Concealing Identity
- Conducting Interviews
- Documenting Human Rights Violations
- Cyber Superhero Toolkit (ZH, EN available)
- Journalists Security Guide [Committee to Protect Journalists]
- Journalists in Hong Kong? These tips will keep you safer and help you do your best job [Committee to Protect Journalists]


